
Google Interaction
Creating Google Forms
Forms are a useful tool to help you plan events, give students a quiz, or collect other information in an easy, streamlined way. A Google form is automatically connected to a spreadsheet with the same title. When you send a form to recipients, their responses will automatically be collected in that spreadsheet.
You can create and send a form from your Documents List or from any existing spreadsheet.
You can create and send a form from your Documents List or from any existing spreadsheet.
How To Upload Files To Google Site:
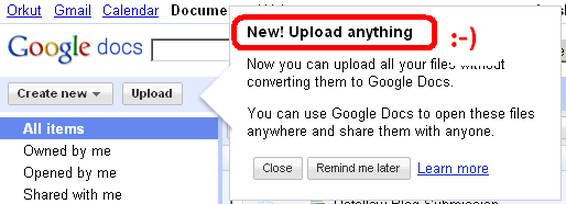
- Click the "Upload" button on the Docs list
2. Click Select files to upload files from your computer. When the Browse dialog is open, select the file you'd like to upload to Google Docs. To select multiple files, press Shift or Ctrl and click all the files to upload. If you first select one file and then decide to upload more, click the Select more files link that appears after you upload the first file.
You can simply store the uploaded file in Google Docs, or convert it to Google Docs format so you can later edit it online. To store the file without converting it, make sure you deselect the option to convert the file. If you’d like to convert your document, presentation or spreadsheet to Google Docs format, you don’t need to take any extra steps. The checkbox right below the Folder drop-down menu is selected by default.
3. Pick a folder to which you’d like to upload the files (this is optional), and click the Start upload button.
File Types and Storage
You can upload any file type to be stored in Google Docs, but you can convert only certain types of files to Google Docs format.
Things you need to Remember while uploading a file to Google Docs, please keep the following in mind:
Things you need to Remember while uploading a file to Google Docs, please keep the following in mind:
- You can only upload and convert these file types:
- For spreadsheets: .xls, .xlsx, .ods, .csv, .tsv, .txt, .tsb
- For documents: .doc, .docx, .html, plain text (.txt), .rtf
- For presentations: .ppt, .pps
- There are some file-size limits. See the size requirements for uploading and converting.
- Some of your original formatting may not be preserved.
Upload and Storage Limit
Files that you store but don’t convert can’t be larger than 1 GB each. You get 1 GB of free storage for your Google Account, and you can purchase additional storage for $0.25 per GB.
Only stored files count towards the maximum limit. If you delete a file and empty trash, you get your storage back.
Only stored files count towards the maximum limit. If you delete a file and empty trash, you get your storage back.
Finding your Stored Files
After you upload a file which hasn’t been converted to Google Docs format, you’ll see it in all your regular views. You can also find it under Items by type > Files.
When you open one of these stored files on your Docs list, you can choose to see a preview of the file, share the file, print it, or download it to your desktop. You can also edit it on locally on your computer (for example, upload a photo, make changes using a photo editor) and then upload the new version of the file to Google Docs.
Important notes
- You can share a stored file that hasn’t been converted, but can’t actually collaborate with someone on it because the file is incompatible with Google Docs format.
- Your storage quota includes plenty of bandwidth for ordinary use. If there’s excessive bandwidth use, we may limit your access for a period of time.